If you plan on connecting an external Wifi router, it’s important to disable the built-in Wifi first. Follow the steps below to get started.
Important: These instructions are for cable customers using the SmartRG modem/router combo.
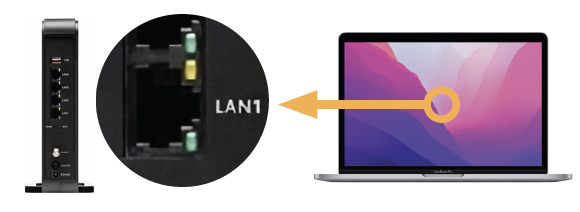
Connect your laptop or computer to the Smart RG modem using an ethernet cable (plug into one of the ports marked LAN).
Important: It is possible to make this change via Wifi. If so, you will need to connect to the default network first, then follow the steps below. Once you have disabled Wifi you will automatically be disconnected.
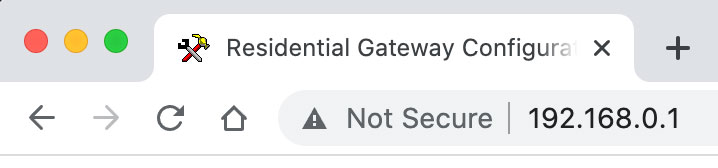
Open a web browser and enter http://192.168.0.1 on the address bar. Select enter when finished.
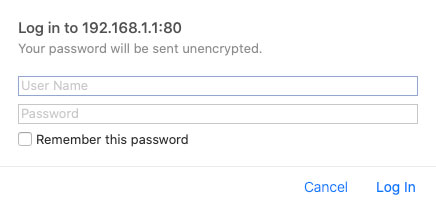
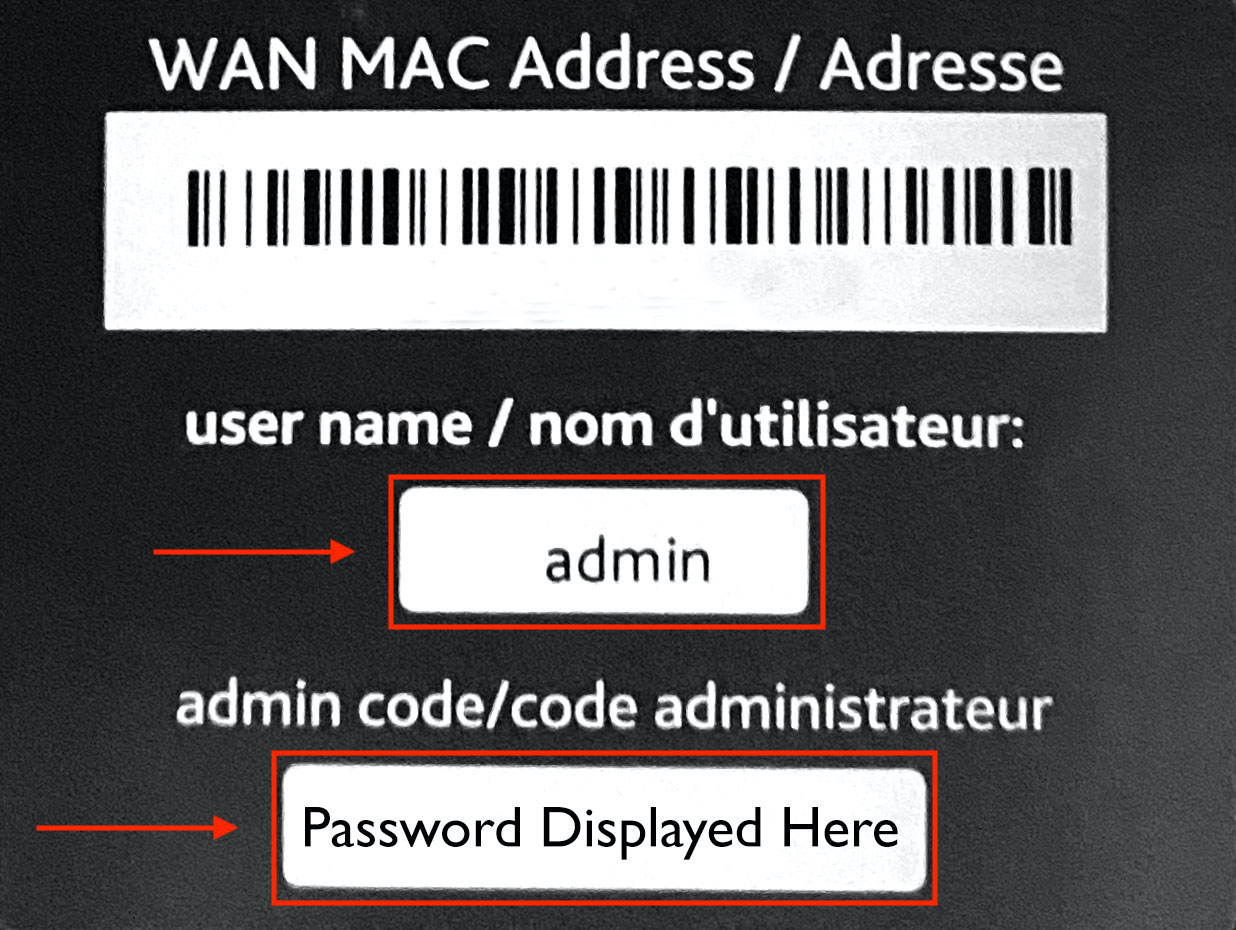
Enter the username and password to log into the modem/router unit. This information is located on the bottom of the device.
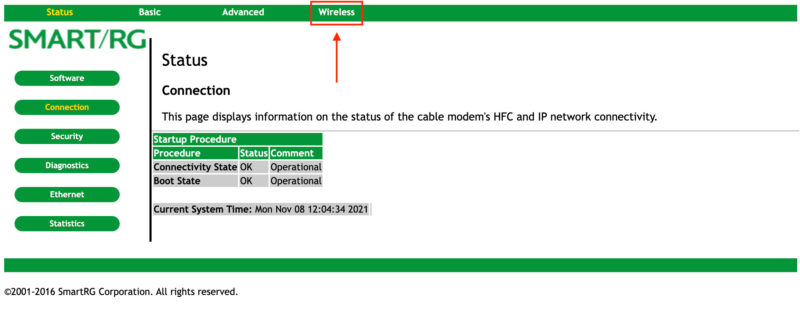
Select ‘Wireless’ from the navigation menu.
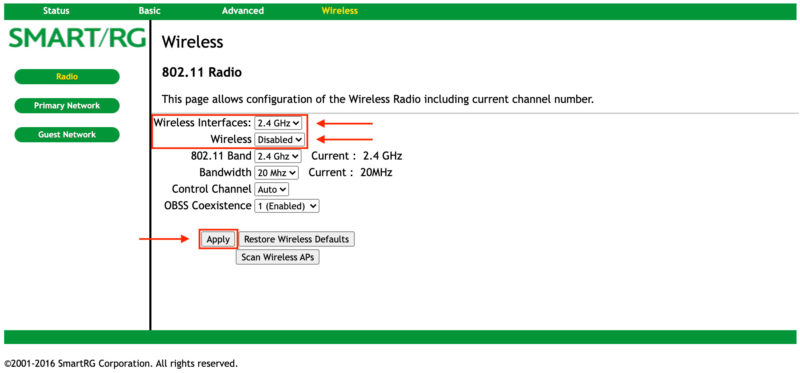
The default tab that will load is called ‘Radio’. Look for the option that says ‘Wireless Interfaces’, it should say 2.4 GHz. Below that option, set ‘Wireless’ to be ‘Disabled’.
Once complete, click ‘Apply’.
Next, change the ‘Wireless Interfaces’ option to be ‘5 GHz’ Below that option, set ‘Wireless’ to be ‘Disabled’.
Once complete, click ‘Apply’.
Important: You need to perform this task on both networks to properly disable Wifi. Please remember to click ‘Apply’ before disabling the second network.
Congratulations! You have successfully disabled Wifi on the built-in router. You can now proceed to connect your own router to one of the LAN ports and proceed with setting it up as per the instructions that came with your own device.